

Showing posts with label fashion. Show all posts
Showing posts with label fashion. Show all posts


GET THE LOOK: TONI TOPAZ
Since Riverdale season 2's finally aired a few days ago, I decided to do another get the look but this time with Toni Topaz and can we just say, her style is badass!

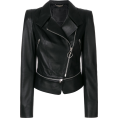
Philipp Plein Bonnif...
(Jacket - coats)
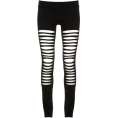
Tajice
(Leggings)
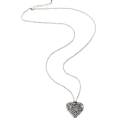
Ogrlica
(Necklaces)
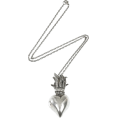
Lančić
(Necklaces)
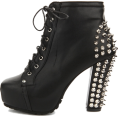
Cizme
(Boots)
65.00€ ~ $86.08
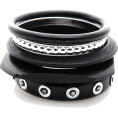
Narukvice Bracelets...
(Bracelets)
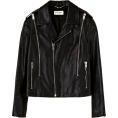
Saint Laurent
(Jacket - coats)
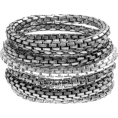
Narukvica Bracelets...
(Bracelets)
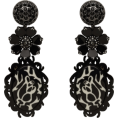
Naušnice
(Earrings)
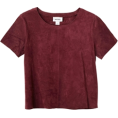
Monki T-Shirt
(T-shirts)
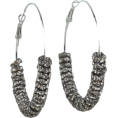
Naušnice
(Earrings)
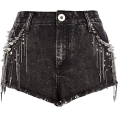
Shorts
(Shorts)
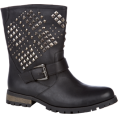
Boots
(Boots)
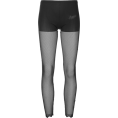
Hysteric Glamour,...
(Leggings)
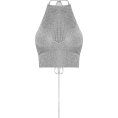
Top
(Tanks)
Stranger Things T-Shirt
SHOULD I STAY OR SHOULD EGGO?
I'm in an 80s mood so i shall continue with yet another Stranger Things themed project. I have today for you a fashion DIY. So you might have noticed these "Should I Stay or Should Eggo" t-shirts and sweaters online and you may have also noticed that they cost quite a bit so instead of spending your money on the shipping fee, why not make it yourself?

- plain white t-shirt
- transfer paper
- iron
- inkjet printer
- flat surface (table)
- scissors
How To Do It:

1. Prepare your image and print it on your transfer paper. For the one I used, I had to mirror the image and print it on the blank side so carefully read the instructions given with your transfer paper.

2. This is how the image appears once mirrored and printed onto the transfer paper.

3. Cut around your image and position it on your t-shirt. I advise not to have the image too high up. When ironing, it is best to use a flat surface e.g a wooden table. An ironing board is not advisable. Heat the t-shirt up before by ironing it. For my transfer paper, the image must be face down on the t-shirt, with the red grid at the back facing upwards. I then slowly and consistently ironed the image for 3 minutes, with circular motions making sure to cover every section.

4. To fix the image, I used a silicon paper which came with the packet. I placed the silicon paper over the design and ironed it for 30 seconds and then peeled it off when it was still hot.


Now you have a cute new t-shirt to add to your closet and one that you can show off to fellow Stranger Things lovers!
Enjoy!

GET THE LOOK: RIVERDALE
Here is my new Get the Look for one of my favourite series, Riverdale. I chose not to do Archie for this one, focusing on the girls' looks as well as Jughead's (<3). Enjoy!

DIY KIMONO

What you'll need:
- fabric
- fabric scissors
- sewing machine
- pins
- ruler
How to do it:
1. For this kimono I chose a dark red coloured fabric with lovely white patterns. It was 1.5m in width and 2m in length. The first thing you need to do is to take your fabric and fold it in two.

2. I have chosen to draw directly onto the fabric to spare some time. The measurements indicated are the ones I used to make a loose fitting kimono. You can adjust them to your size.

3. I started off by drawing the sleeves of my kimono indicated in blue on my drawing and then I drew the line going from the underarm to the end of the raw edge indicated in pink. Instead of drawing both sides, I drew only one half of the kimono, folded my fabric in two once again and then cut out the kimono in order to have it symmetrical.
I then drew the neckline indicated in green on my drawing. Once this was done, I cut the neckline opening making sure to cut through only one layer of fabric.

4. Now take out your sewing machine and sew and hem all the parts shown on my drawing. Use a straight stitch, staying as close as possible to the edge of the fabric.

And you are done!

Enjoy!
DIY DISTRESSED BLEACHED TEE

What you'll need:
- T-Shirt (I got mine at a Japanese recycle shop for $1.25)
- fabric scissors
- razor (optional)
- spray bottle
- bleach
This is the t-shirt I chose:

How to do it:
1. For this DIY, make sure to do it on an even surface away from anything you are afraid might get stained by the bleach. So stay away from any antiques!
2. I started off by cutting a small V shape into the t-shirt. There was already a small V beneath the neckline on my t-shirt so all I had to do was cut it out.

3. Once I did this, I proceeded to put little and big holes in the t-shirt to give it that distressed look. I used the scissors to make the holes and made sure to stretch out the bigger holes with my fingers to make it look ripped rather than cut.

4. I continued distressing the t-shirt with the scissors to create rips. You may also use the razor for this part.


5. Once I was happy with the distressed look, I put the bleach in a small spray bottle and sprayed the bleach on the different parts of the t-shirt. I also chose to spill some bleach onto the shirt making bigger stains. The bleach stains should appear immediately.

6. I soaked the t-shirt in cold water to stop the bleach from bleeding through too much and then I let it dry overnight.

And you should have a lovely distressed t-shirt ready to show-off the next day!


Enjoy!

ICE CREAM NAILS

Sorry for being so inactive lately, I've been very busy with my exams and I still have a few more to go. Now that it is summer, you are probably looking for a fun project to try out or something to put the cherry on top of your look. Well I found the perfect DIY at www.blog.lulus.com.
What you'll need:

– a base colour (turquoise)
– some “ice cream colours” (strawberry pink and vanilla white)
– two shades of brown for the “cone”
– a red for the cherry
– a striper brush
How to do it:
1. Start with a few coats of your base colour. Make sure that it’s completely dry before continuing.

2. Then take your ice cream colour and paint a “scoop at the tip of your nail. You should be able to just swoop over the tip of the nail and get a good circle shape. This might require a couple of coats. Just be sure to let the polish dry between coats.

3. Take some of your cherry red polish & drop it onto some scrap paper or foil. Using the back end of your paint brush, dip it into the paint.

4. Then take the dipped paintbrush end and dab it onto the top of the ice cream scoops.

5. This part is optional, but you can take a toothpick and dip into any colour of nail polish. Then dab the toothpink on an angle onto the ice cream to create sprinkles!

6. Then take your lighter brown and make triangular shapes on the tips of your nails on your OTHER hand. They don’t have to be perfect.

7. Then using your striper brush, grab some of your darker brown and outline the triangles. Then draw a criss-cross pattern on the cone so that it look like a yummy waffle cone!

8. Just top coat both hands & you’re done!
Such a simple tutorial by Lulu's!
Enjoy!
Subscribe to:
Posts (Atom)
