Day Out To The British Museum!
Hello everybody! Today I had a nice day out to the British Museum to see once again the mummies of Ancient Egypt. I've seen them so many times, I've lost count but I still love going to the museum especially since it's my favourite one! Here are some pictures:
Enjoy!
'Ello 'Ello 'Ello!
Hiya! I haven't posted many things lately due to the fact that I am back in my hometown, London! I've been away for 2 1/2 years and I am finally able to visit my family and to go back to everything I once knew! Yay! It's definitely nice to get away from my life in Asia and to visit London once again. The only saddening part in all this is the fact that I have to return as a tourist. But... I get to watch Pretty Little Liars with my cousin! All this is to tell you that I might not be able to post anything for a month or so. Here are a few pictures I've taken since I've arrived in England:
Enjoy!
DIY Mini Flowers
DIY Mini Flowers:
What you'll need:
- hot glue gun
- pencil
- scissors
- a small lid
- thin wire
- coloring pens
- paper
What you'll need:
- hot glue gun
- pencil
- scissors
- a small lid
- thin wire
- coloring pens
- paper
How to do it:
1. Draw your petals on a piece of paper.
2. Color them in. I chose green and purple.
3. Cut them out.
4. Now start sticking the petals with your hot glue gun to the thin wire.
5. Continue gluing them until they look like this.
6. Glue it in your little lid like this.
Finished! Here are two mini flowers I've made recently.
Enjoy!
Chocolate Dipped Cupcake
Chocolate Dipped Cupcake:

What you'll need:
For the Chocolate Cupcakes:
3/4 cup all purpose flour
1/3 cup cocoa powder
3/4 teaspoon baking soda
1/2 teaspoon salt
1/2 cup plus 2 tablespoons of granulated sugar
1/2 cup buttermilk
1/3 cup vegetable oil
1 large egg
1 teaspoon pure vanilla extract
For the peanut butter buttercream:
1/2 cup granulated sugar
2 large egg whites
1/8 teaspoon salt
12 tablespoons softened unsalted butter (cut into 1/2 inch pieces)
1 cup peanut butter
2 teaspoons pure vanilla extract
For the chocolate coating:
8 ounces semi-sweet chocolate (finely chopped)
1 1/2 tablespoons vegetable oil
How to do it:
1. Heat oven to 350 degrees F. Line muffin pan with 10 cupcake cups
2. In medium bowl combine flour, cocoa, baking soda, and salt. Set aside.
3. In larger bowl combine sugar, buttermilk, oil, egg, and vanilla until smooth. Add dry mixture and whisk until smooth. Spoon batter into cupcake cups, dividing evenly.
4. Bake 25 minutes or until center is just set. Let cool in pan for 10 minutes and then transfer cupcakes to wire rack. Cool completely.
5. While cupcakes are cooling, prepare the buttercream frosting. Combine sugar, egg whites, and salt in bowl of electric stand mixer.
6. Set bowl over pan of simmering water. Gently whisk until mixture registers 160 degrees F on instant-read thermometer.
7. Immediately transfer bowl to electric stand mixer. With whisk attachment, whip on medium-high speed until mixture resembles consistency of shaving cream.
8. On medium speed, add butter one piece at a time until combined and creamy.
9. Whip in peanut butter and vanilla, and beat until smooth.
10. Transfer buttercream to pastry bag fitted with a plain 1/2 inch tip
11. Pipe 1/3 cup frosting onto each cupcake. Chill cupcakes in refrigerator until buttercream is completely firm, about 1 hour.
12. Once the cupcakes have chilled, make the chocolate coating. Place oil and chocolate in a medium bowl and melt over a pan of gently simmering water.
13. Stir until chocolate has melted and mixture is smooth. Transfer to a large coffee mug.
14. Holding cupcake by the bottom, carefully dip into the chocolate. Be sure to submerge all of the buttercream.
15. Pull up and hold for a few seconds to let excess chocolate drip off. Transfer to cooling rack and repeat with remaining cupcakes.
16. Before serving, let cupcakes rest a few minutes so chocolate can set.
Enjoy!
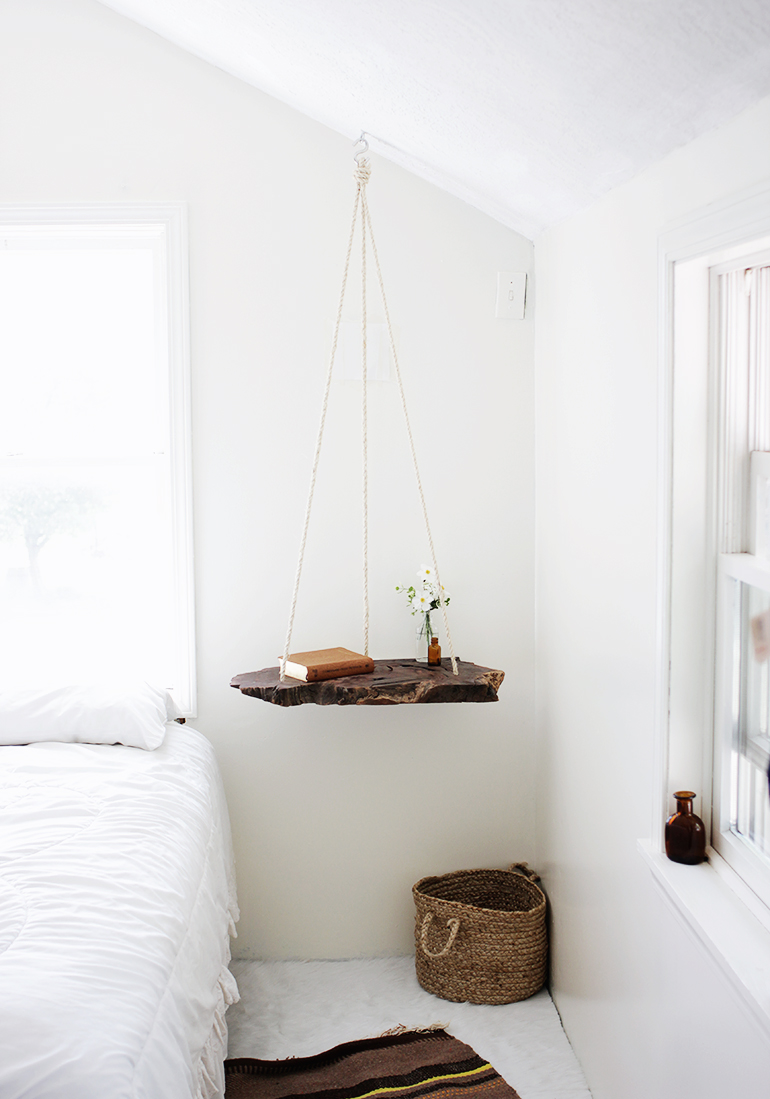
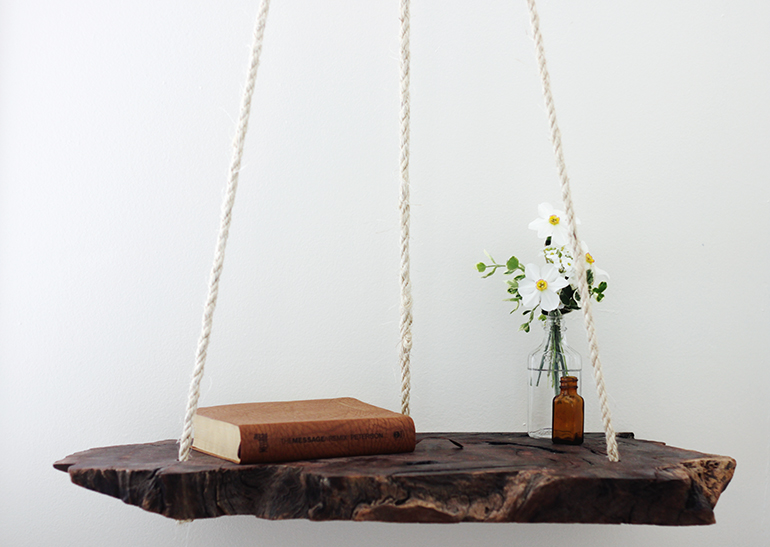
DIY Hanging Table
DIY Hanging Table:

What you'll need:
- Cross Section of Wood
- Saw
- Orbital Sander
- Spray Polyurethane
- Drill
- Felt
- Hot Glue Gun
- Rope
- Toggle Lock – that will fit your eye screw
- Eye Screw
- S-Hook
How to do it:
1. Cut a flat side in your wood – this will be the side that rests against the wall.
2. Sand your cross cut down into a smooth surface.
3. Drill three holes (the width of your rope) on your piece of wood. One centered in the back and the other two, equal distance from the first, towards the front of the wood.
4. Coat the wood in a few coats of polyurethane. Let it dry in between coats.
5. Cut a piece of felt slightly smaller than the edge that will rest against the wall and hot glue it in place. This will help prevent scratching up you wall but you can skip this step if you want!
6. Lace your rope through the holes. I started at the left side tied a loose knot at one end of the rope and threaded the other end up through the hole. Leave enough rope to reach up to the height you want the table to hang at and back down. Thread down through the second hole and then up through the third hole. Leave untied until you are ready to hang it.
7. Measure how far out your ropes will have to be from the wall for the back of your table to hang so that it’s resting right up against the wall. Make a mark at that spot.
8. Drill a hole that will fit your toggle lock.
9. Insert the toggle lock according to instructions on the package.
10. Screw in eye screw and then hook s-hook through it.
11. Put the first loop and the rest of the rope coming up from the third hole over the s-hook. Make sure the table is level by adjusting the rope. Take the long remainder of rope (coming up from the third hole) and wrap it around the three strands a few times, tuck the end down through what you wrapped and then pull tight and trim excess rope.
12. If it is not completely level you can loose the knot tied below the first hole and adjust the knot up or down until the table is level. Make sure the knot is secured tightly and then trim excess rope.


Finished!


Enjoy!
http://themerrythought.com/

What you'll need:
- Cross Section of Wood
- Saw
- Orbital Sander
- Spray Polyurethane
- Drill
- Felt
- Hot Glue Gun
- Rope
- Toggle Lock – that will fit your eye screw
- Eye Screw
- S-Hook
How to do it:
1. Cut a flat side in your wood – this will be the side that rests against the wall.
2. Sand your cross cut down into a smooth surface.
3. Drill three holes (the width of your rope) on your piece of wood. One centered in the back and the other two, equal distance from the first, towards the front of the wood.
4. Coat the wood in a few coats of polyurethane. Let it dry in between coats.
5. Cut a piece of felt slightly smaller than the edge that will rest against the wall and hot glue it in place. This will help prevent scratching up you wall but you can skip this step if you want!
6. Lace your rope through the holes. I started at the left side tied a loose knot at one end of the rope and threaded the other end up through the hole. Leave enough rope to reach up to the height you want the table to hang at and back down. Thread down through the second hole and then up through the third hole. Leave untied until you are ready to hang it.
7. Measure how far out your ropes will have to be from the wall for the back of your table to hang so that it’s resting right up against the wall. Make a mark at that spot.
8. Drill a hole that will fit your toggle lock.
9. Insert the toggle lock according to instructions on the package.
10. Screw in eye screw and then hook s-hook through it.
11. Put the first loop and the rest of the rope coming up from the third hole over the s-hook. Make sure the table is level by adjusting the rope. Take the long remainder of rope (coming up from the third hole) and wrap it around the three strands a few times, tuck the end down through what you wrapped and then pull tight and trim excess rope.
12. If it is not completely level you can loose the knot tied below the first hole and adjust the knot up or down until the table is level. Make sure the knot is secured tightly and then trim excess rope.


Finished!


Enjoy!
http://themerrythought.com/
4th of July Nail Art
4th of July Nail Art:
Since tomorrow is the 4th of July, it's time to get a patriotic manicure! Here is how you do it:

What you'll need:
- Base Colors: Blue, Red
- Stamping Color: White
- Stamping plates: Stars, diagonal stripes and pointer finger
- Heart: China Glaze White on White
- Top Coat: Seche Vite
- dotting tool
How to do it:
1. Paint your small finger nail red. Create the heart with china glaze white on white and a dotting too. Make two dots close together to form the top of the heart and then draw the bottom of the heart with tiny little dots.
2. Paint two of your finger nails blue (whichever one you want). Add the stars in white.
3. Paint the two remaining finger nails red and add the stripes in white also.
Happy 4th of July!
Enjoy!
http://dailysomething.com/
Since tomorrow is the 4th of July, it's time to get a patriotic manicure! Here is how you do it:

What you'll need:
- Base Colors: Blue, Red
- Stamping Color: White
- Stamping plates: Stars, diagonal stripes and pointer finger
- Heart: China Glaze White on White
- Top Coat: Seche Vite
- dotting tool
How to do it:
1. Paint your small finger nail red. Create the heart with china glaze white on white and a dotting too. Make two dots close together to form the top of the heart and then draw the bottom of the heart with tiny little dots.
2. Paint two of your finger nails blue (whichever one you want). Add the stars in white.
3. Paint the two remaining finger nails red and add the stripes in white also.
Happy 4th of July!
Enjoy!
http://dailysomething.com/
Get the look: Disney Princesses no3
Preen knee length dress / Blue dress, $33 / Aztec print top, $26 / H M white long sleeve top, $26 / Yves Saint Laurent long beige skirt / Purple sequin skirt / Office short boots, $130 / LA: Hearts flats sandals / ALDO flats sandals / ASOS black shoes / H M black ballet flat, $14 / Ava Aiden blue necklace / Eugenia Kim head wrap turban, $64 / Accessorize head wrap headband / Wrap headband / Contempo Greek Key Pewter Liner 8 in. x 1 in. Metallic Wall Trim Tile
Get the look: Disney Princesses no2
Temperley London lace dress / Sleeveless dress, $67 / Givenchy top / Issa chiffon top / Petit Bateau short sleeve shirt / CADOLLE sleeveless shirt, $130 / Alice You jumpsuits romper / Monki blue skirt, $41 / Dorothy Perkins skirt / Sergio Rossi leather shoes / Ancient Greek Sandals leather shoes, $205 / Leather shoes / Seychelles strappy sandals / Vegan shoes, $22 / Hermès wet look glove / Claire Gary Brave Bear / Blade Rubber Stamps Magenta Magenta - People and things Paper Lanterns, $23 / Spring Inspirations 66 Blossom Garland Pink
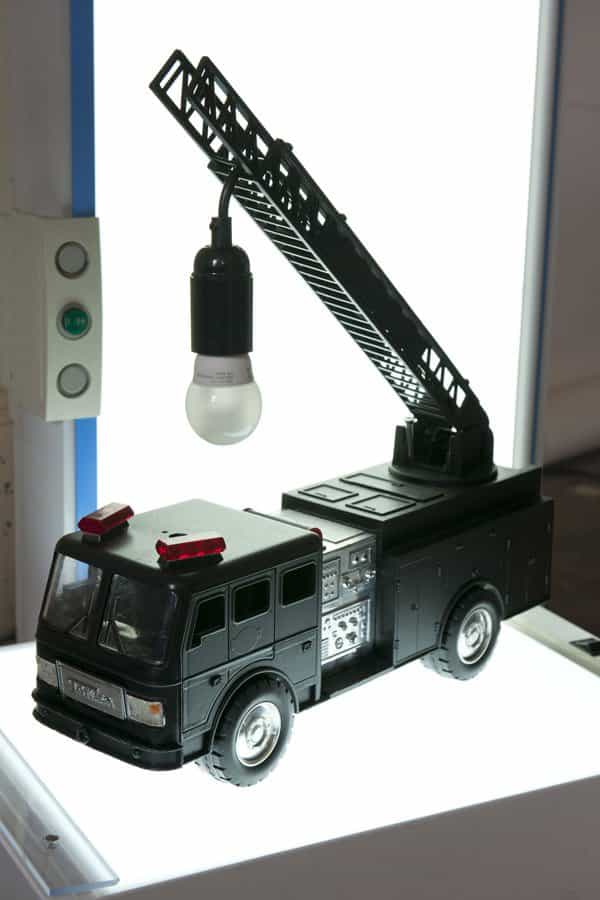
Upcycled Fire Truck Lamp
Upcycled Fire Truck Lamp:

What you'll need:
- fire truck
- black spray paint
- energy saving globe lightbulb
How to do it:
1. Take an old fire truck.
2. Spray paint it and wire it to become a new lamp.
3. Use an energy saving globe light bulb to hang off the ladder and over the truck.


Enjoy!
http://www.recyclart.org/

What you'll need:
- fire truck
- black spray paint
- energy saving globe lightbulb
How to do it:
1. Take an old fire truck.
2. Spray paint it and wire it to become a new lamp.
3. Use an energy saving globe light bulb to hang off the ladder and over the truck.


Enjoy!
http://www.recyclart.org/
Doctor Who: Weeping Angel DIY
Doctor Who: Weeping Angel DIY

What you'll need:
- Hot Glue Gun
- Craft Foam
- A Barbie
- Wooden Skewers
- A base
- A mini gauze dress
- craft glue
- House Paint Primer
- Sand texture spray paint
How to do it:
1. Cut a wing shape out of craft foam and add the details with hot glue

2. Jointed arm barbies aren't in the correct position to cover their eyes, so cut the arms off and reattach them at the elbows. Secure it with more hot glue.


3. Take some time to glue all of her joints so they are solid then attach her to a base with wooden skewers.

4. Attach her wings with hot glue.
5. Add a simple gauze dress.

6. In order to create the carved waves seen in statuary, you will need to use your hot glue gun again...

7. Use craft glue to settle her dress more. Prepare the piece for priming.

8. After the piece is primed, it should look entirely white.
9. Now use the sand textured spray paint.

And voila!
For all the Doctor Who Fans...


Don't blink!
Warning: Place a mirror directly opposite her so she will be trapped.
Enjoy!
http://wich-crafts.blogspot.co.il/

What you'll need:
- Hot Glue Gun
- Craft Foam
- A Barbie
- Wooden Skewers
- A base
- A mini gauze dress
- craft glue
- House Paint Primer
- Sand texture spray paint
How to do it:
1. Cut a wing shape out of craft foam and add the details with hot glue

2. Jointed arm barbies aren't in the correct position to cover their eyes, so cut the arms off and reattach them at the elbows. Secure it with more hot glue.


3. Take some time to glue all of her joints so they are solid then attach her to a base with wooden skewers.

4. Attach her wings with hot glue.
5. Add a simple gauze dress.

6. In order to create the carved waves seen in statuary, you will need to use your hot glue gun again...

7. Use craft glue to settle her dress more. Prepare the piece for priming.

8. After the piece is primed, it should look entirely white.
9. Now use the sand textured spray paint.

And voila!
For all the Doctor Who Fans...


Don't blink!
Warning: Place a mirror directly opposite her so she will be trapped.
Enjoy!
http://wich-crafts.blogspot.co.il/
Subscribe to:
Posts (Atom)


