
What you'll need:
- Galvanized Wire
- Soldering tool
- Flux core Solder
- Rosin Soldering Flux
- Pliers
- Permanent marker
- Ruler (a cutting mat is perfect to measure)
- A glass cup
- 1 toothpick
- Spray paint or primer (if you want it in color)
- A little piece of paper or cardboard for the bottom
- Optional ribbon for top

How to do it:
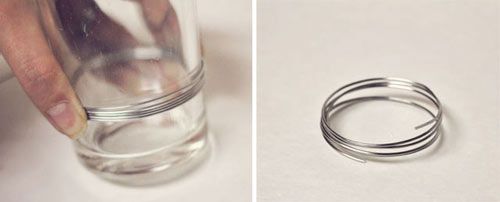
1. The first step is to create the rings for our birdcage, and the size will depend on the size of the cup you decide to use, I've made birdcages using shot glasses and using the smallest glasses I have. You can try to see how big your circle ends up because after you wrap the glass with wire it will losen up, being bigger than the diameter of your cup.
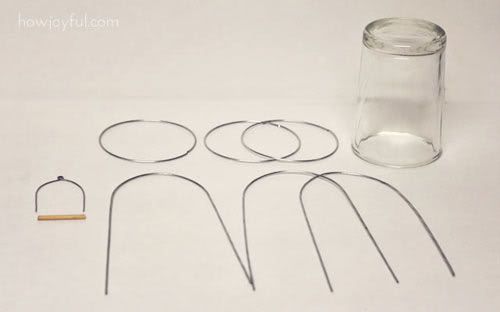
2. After that we will need to cut the pieces we will be using to assemble our birdcage, you will need:
- 3 circle pieces
- 3 main structure pieces
- 1 toothpick
- Horse shoe shape for the bird hanger
To make the 3 main structure pieces I measured 4 inches in a straight piece, and then bend using the same glass cup until I had te desire shape, I cut the pieces leaving 3 inches on each side after the curve. It's very easy if you just lay the piece in a mat and mark where the curves start and measure from there. After that you will need to solder the circle pieces to close them.


For the bird hanger, you basically have to first make a loop in the top (to attach this piece to the birdcage) and then, bend the bottom so that you wrap the toothpick, just like shown in the pictures above, you can also see how I measure everything in my cutting mat.
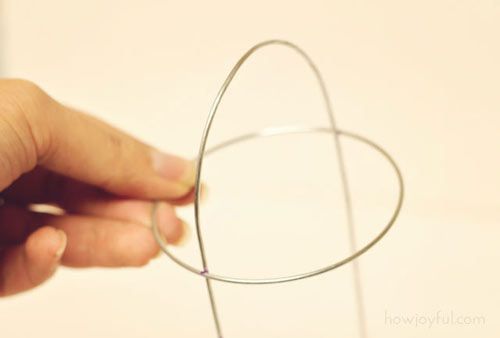
3. To assemble the birdcage you will need to first mark all of your structural pieces where the curve starts, so it will be your first horizontal ring. I started with one ring and one structure piece. If you have trouble holding the pieces to solder, tape them to the glass. That always helps me =]
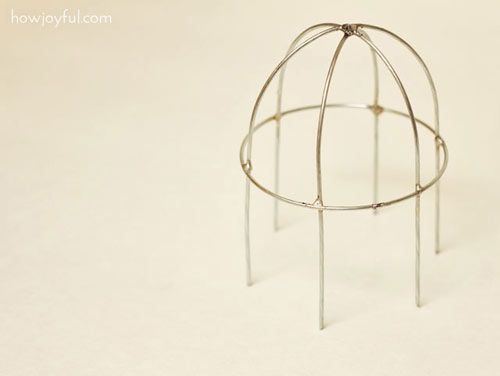
4. After that you will need to visually mark your circle so you can add the other two structures. Here is where you can just mark an approximate, because the exact measure will depend on how big your circle is. And since this is just a little fun project, go with and approximate. Divide the space so the other two fit and your all set. Attaching the other 2 circles is way easier, just measure an inch below the first and solder =]
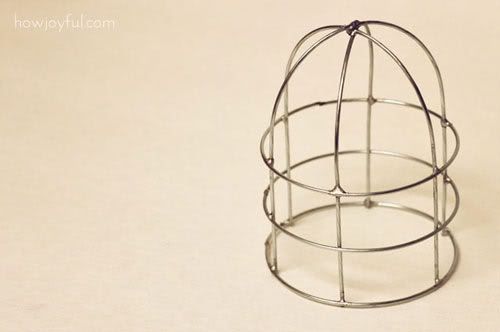
5. As you can see here I really liked how my birdcage end up, but I thought that the top was too empty, so what I did was mark 3/4" up the line and I added another ring, but in this case since I didn't know the exact measurement for that one, I took a shoot glass and made a smaller one, I left that piece bigger than I needed it so I could cut, once I had the exact piece I wanted. In this case I solder all the piece to my little marks leaving the first and last open to be able to cut. I made sure I was not going to cut too small or too big and the solder the end. I know it sounds complicated, but it was the easiest piece to solder because all the structure is already there.
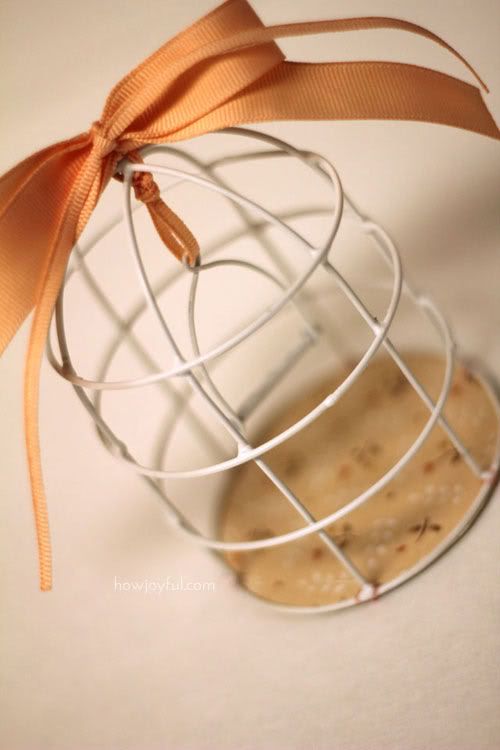
6. After you finish, clean your structure with a paper towel to take all the oil from the soldering and spray paint it if you want. Attach the bird hanger to the inside of your birdcage by making a knot in the ribbon. After that add the piece of paper to the bottom (you can glue it, or you can do what I did and stitch the paper to the wire – I just don't like hot glue so much)
And there you go, a cute and very long-lasting birdcage!
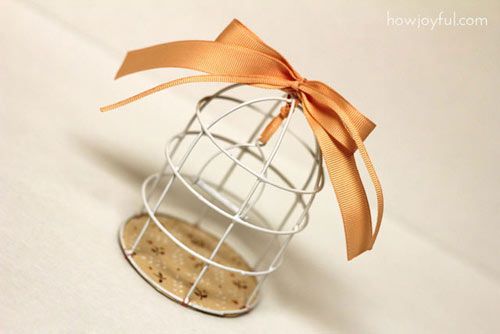
Enjoy!

No comments:
Post a Comment