Welcome to the family!


So today, we got a new cat. Her name is Evergreen A.K.A Eva. Near my house, this weird woman who lives on the street had this very adorable cat with beautiful green eyes. At first glance, I knew i had to have her. The most horrible part is that this woman was mistreating her cat. She didn't let her walk around. Day and night, she stayed in under her tent without any food or water. She was tied up with barely enough space to sit. It pained us to pass infront of her everyday without being able to help her. Now and then we would stop by to see how she was doing. Last time we went to see her the rope was about 10cm, it gets shorter and shorter everytime we see her.(woman is scared the cat will run away) We stopped once with a bag of catfood, sadly we didn't have any water. We made sure to open the bag of food otherwise that woman woud have sold it to someone. We even had to buy a bottle of water from that woman to give to her own cat. We asked this lady called Loan who works for an animal help organization to help us rescue that poor cat. We didn't think it would be possible but she did it. We had to pay $30 instead of $100 (her initial price). And here she is now!

MEET EVERGREEN!


How adorable is she?

Union Jack Nail Tutorial

Union Jack Nail Art Tutorial:

Union Jack British Flag Nail Art Tutorial


What you'll need:

- White nail polish
- Dark Blue nail polish
- Red nail polish
- Sparkly Red nail polish
- Nail art brush


How to do it:


Union Jack British Flag Nail Art Tutorial

1. Paint on a base of white. Try to keep the surface as smooth as possible with steady brush strokes.


Union Jack British Flag Nail Art Tutorial


2. When your base colour is completely dry, use the red nail polish and your nail art brush to paint on a thick cross. Start with a vertical line straight down the middle and then go across.


Union Jack British Flag Nail Art Tutorial

3. Add some smaller line going from the centre outwards. Try not to touch the thick cross if you can avoid it.


Union Jack British Flag Nail Art Tutorial

4. Fill in the 8 blank triangles you are left with. Again, try not to touch any of the details that are already there but don't worry if you do, it can be tidied up later.

Union Jack British Flag Nail Art Tutorial


5. There are a lot of steps rounded up in to this one. Let me give you a run down.

If you are going to add glitter, this would be the time to do so! Just apply it carefully on top of the existing colours with the nail art brush.

When everything is dry, take some white acrylic paint or nail polish on a nail art brush and go over the white lines to tidy up any mishaps and get crisper lines.

Using a small paintbrush dipped in acetone, run it around your cuticles to clean up the bits of polish that have been left there and leave you with a perfectly round edge.

Finally, add a few coats of your favourite top coat to make it shiny, make it last and smooth out the surface which will probably be a bit bumpy at this point.

All done!

Union Jack British Flag Nail Art Tutorial


Enjoy!

Teen DIY Pencil Case/Purse

Teen DIY Pencil Case/Purse:


So a few days ago, I decided to make my very own pencil case for the first day back to school, but it turned out smaller than I wanted it to be and looked more like a purse with a zip. Sadly I do not have any pictures to accompany my instructions.

What you'll need:

- denim
- zip
- sewing machine
- bleach
- scissors

How to do it:

1. I first cut the leg of an old denim and cut it into 16 x 11 inches rectangle.

2. I then folded the rectangle in half to create a smaller rectangle which will be about 8 x 6 inches.

3. After i sewed the two 6 inches sides of the pencil case.

4. I then did a mountain fold at the bottom of the purse and at the top I added a dark blue zip.

5. I decided to dip the bottom of my purse in bleach and added a few slits to make it more fancy.

That is all!

Enjoy!

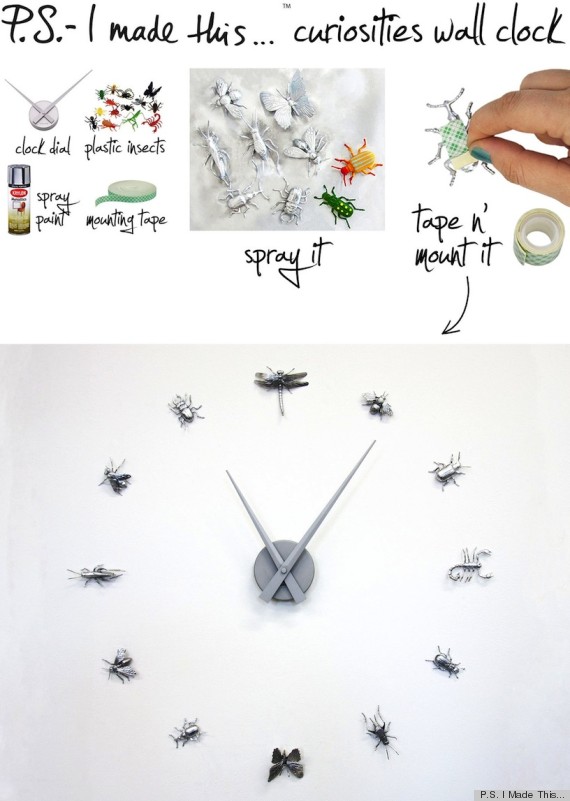
P.S.- I made this... curiosities wall clock


diy clock

How to do it:

1. Coat twelve plastic insects with silver spray paint.
2.  Once fully dried, adheremounting tape to the back of each bug. 
3. Mount the clock dial in the desired place and stick each bug around at the correct hour. 
4. For extra precision, you may want to mark the hours with a pencil before mounting the bugs.

Enjoy!

Something Cosy...

Something Cosy...

This year, sadly we were not able to go away on holiday. I live in Cambodia. It's a small little country which doesn't have anything really interresting for teenagers, no parks, no nice place to hang out well basically this year was going to be boring. So my little sister and I decided to make a Summer To-Do List. and on this list we decided to build a tent. I don't have garden either, there aren't any gardens in this country, so we built an indoor one.


Reading time...


My little kitty Millie or Mimi...


My other little girl Tazzy La Principessa... I mean, look at that! Aww!


And then finally Thomas A.K.A Tom Tom A.K.A Oyster Sauce A.K.A Estoy Cute...


We also roasted some marshmallows, once again indoor but it's better than nothing.

It turned out to be a pretty nice night...

DIY Vintage Spoon Wall Hooks

DIY Vintage Spoon Wall Hooks:


What you'll need:

- thin silver spoons (Use sterling NOT stainless steel silverware. Sterling Silver bends as where stainless is nearly impossible to bend.)
- wood plaque
- Steel Wool (for shining up the silver)
- flat surface for hammering
- hammer
- drill
- screws

How to do it:

1. Start by gathering all your materials. 

2. If you are using an old piece of wood, please check for nails, slivers of wood, etc that could harm you, remove any and proceed. 

3. Use a flat surface and flatten the spoon with a hammer. Then bend the handle of the utensil. This part is a bit tricky. If you find that you cannot try placing the spoon into boiling water, carefully remove it (don’t forget your mittens!) bend the handle around a small round object.

4.  Next, drill in a screw through the spoon to the wood. Again, this process works best for thin, sterling silver spoons. If you are struggling you can dremel a hole.


Enjoy!

DIY Urban Outfitters Wall Art

DIY Urban Outfitters Wall Art:


What you'll need:

- 24 x 30 inch canvas
- 20 nature photos
- Mod Podge
- stained glass foiling tape

How to do it:

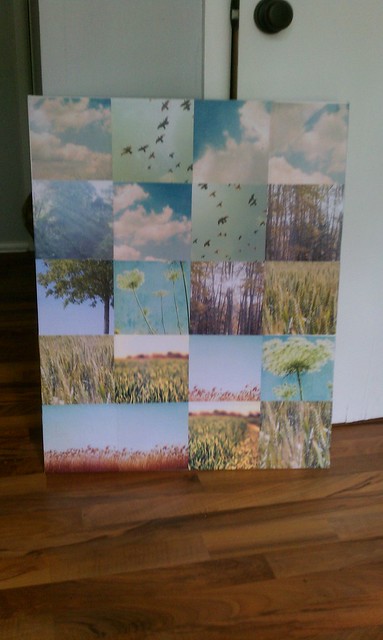
1. I started with a 24 x 30 inch canvas and 20 nature photos that I cut down into 6x6 square. I played around with the layout until I found one I liked.


2. Then I mod podged them onto the canvas.


3. And ended up with this...


4. And for the final step I took a roll of this stuff..


Stained glass foiling tape.

It is basically copper tape and such an easy product to work with. Just peel the backing off and stick! And it can be molded around the edges of the canvas for a really great finished look. I outlined all of the edges of the photos with it and put it around the canvas edges. Here is the finished product...


Nice eh?
Enjoy!

Summer Outfits

Summer Outfits:

So here are some of my favourite summer outfits. I've matched some denim shorts with different tank tops, shoes,necklaces and bags. I hope you like them and be sure to comment which one of these outfits is your favourite.

Enjoy!

Converse Revamped

Converse Revamped:

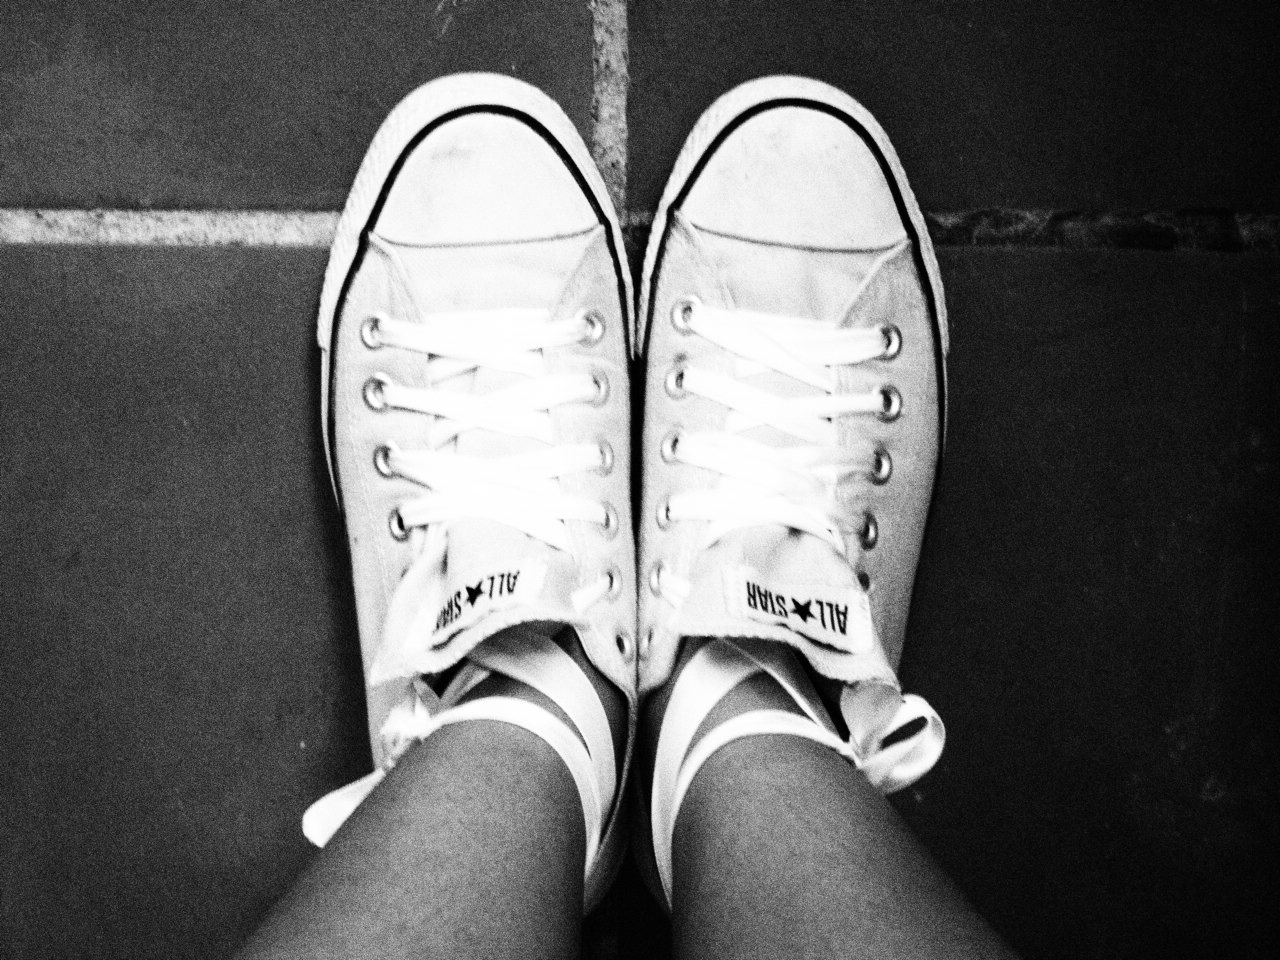
So today I gave my light blue pair of converse a makeover with the help and brilliant mind of my sister who absolutely loves ballet. I replaced the old laces with new light pink ribbons. Like a real ballet pointe shoe, we burnt the tip of the ribbon. I placed the ribbon trough each hole just like I would do with my converse's original laces.


                      AFTER


Enjoy!

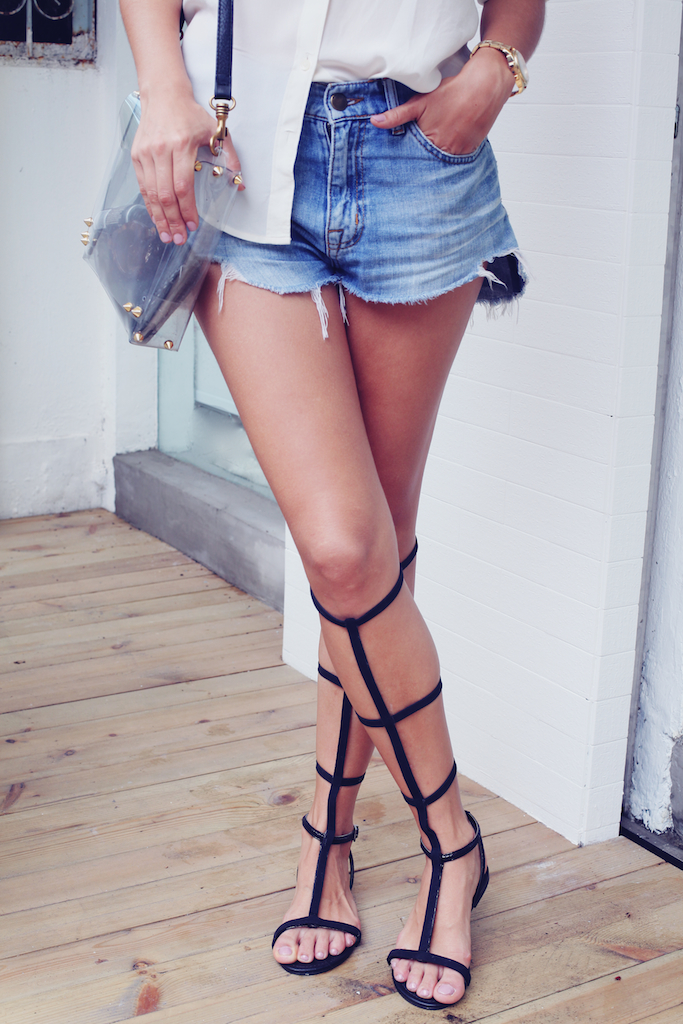
DIY Alexander Wang Inspired Gladiator Sandals

DIY Alexander Wang Inspired Gladiator Sandals:

DIY GLADIATOR SANDALS 101 (1)

What you'll need:
  • At least 5 yards of leather (or faux leather) trim (try to match the material and width of the straps of your flats as much as possible)
  • Sharp scissors
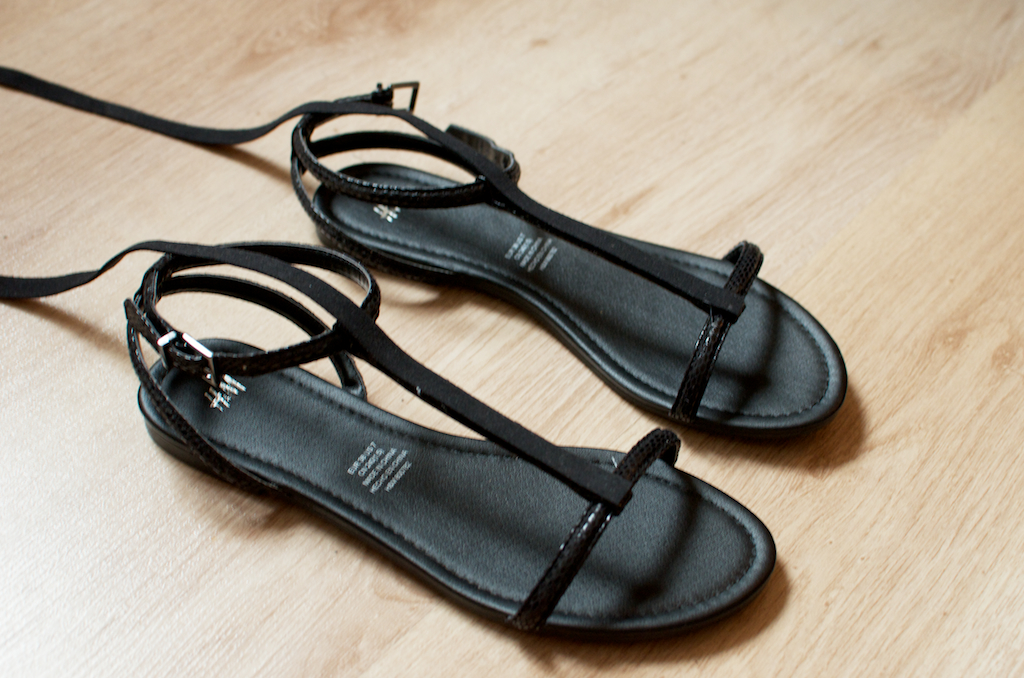
  • Flats (I used these simple H&M ones)
  • E6000 glue
  • 6 press stud buttons
  • A multi hole punch tool
  • Optional: some pvc or wire to stiffen the main gladiator spine
DIY GLADIATOR SANDALS 103


How to do it:


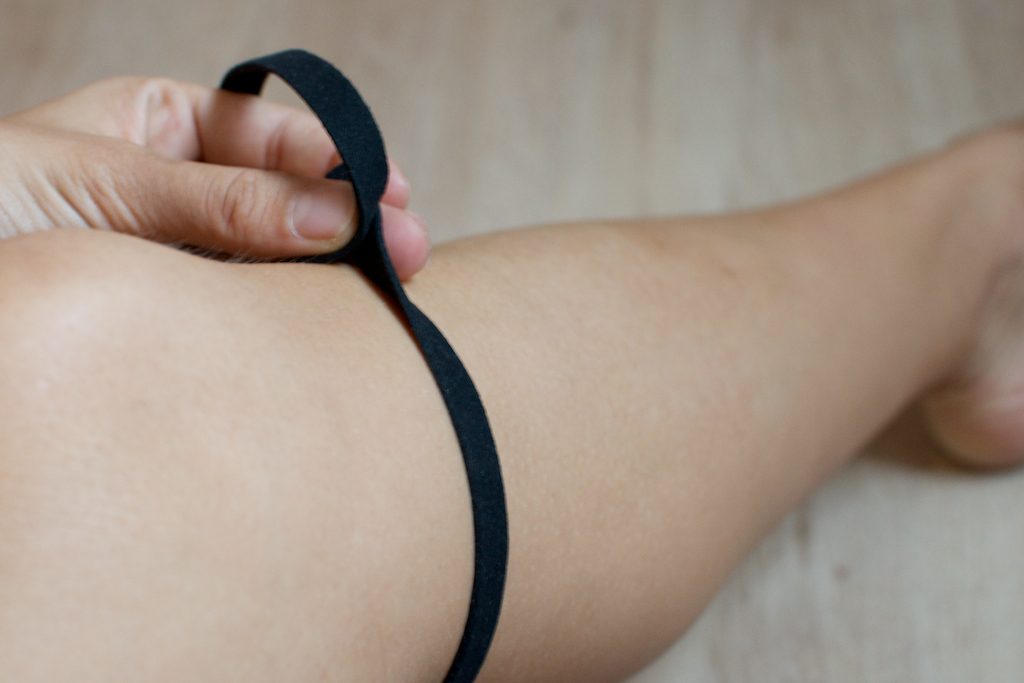
1. Start by deciding how many strips you want to go around your legs, I went with three to keep it simple and almost geometric looking. Then measure your calf in the places you want to put the strips.
DIY GLADIATOR SANDALS 104

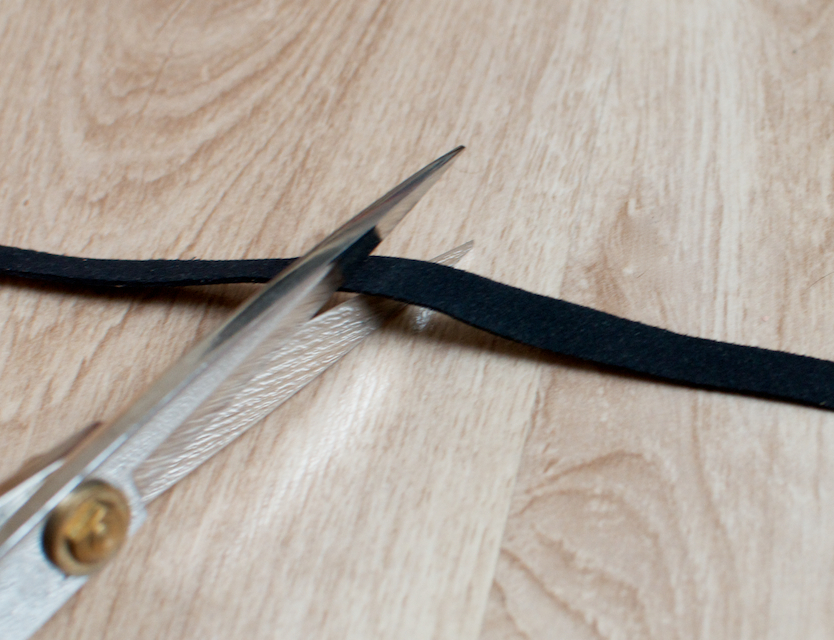
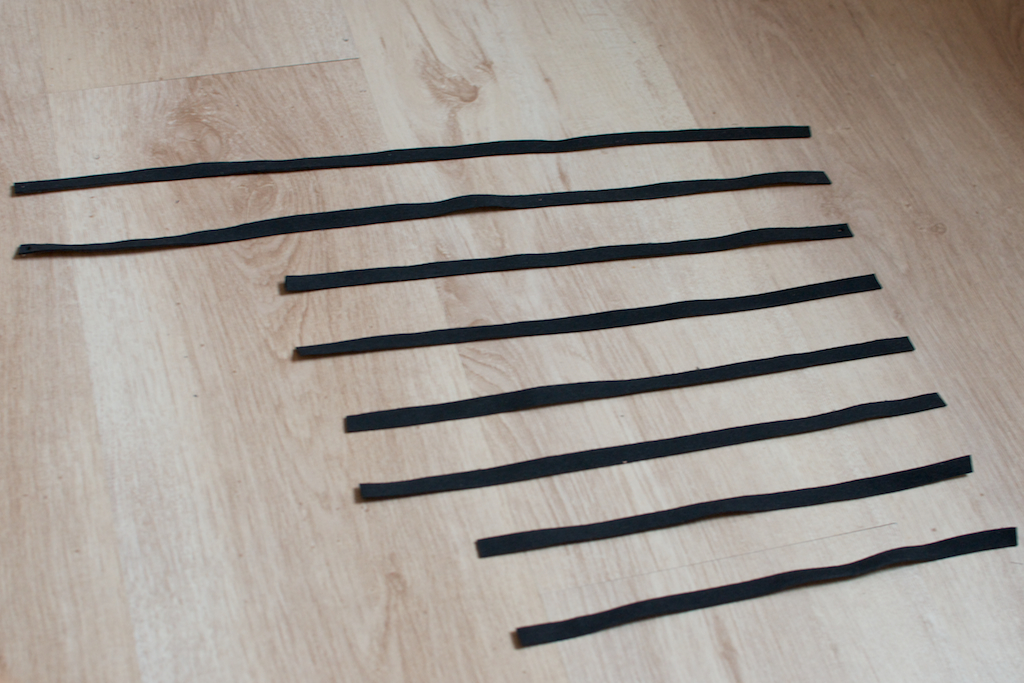
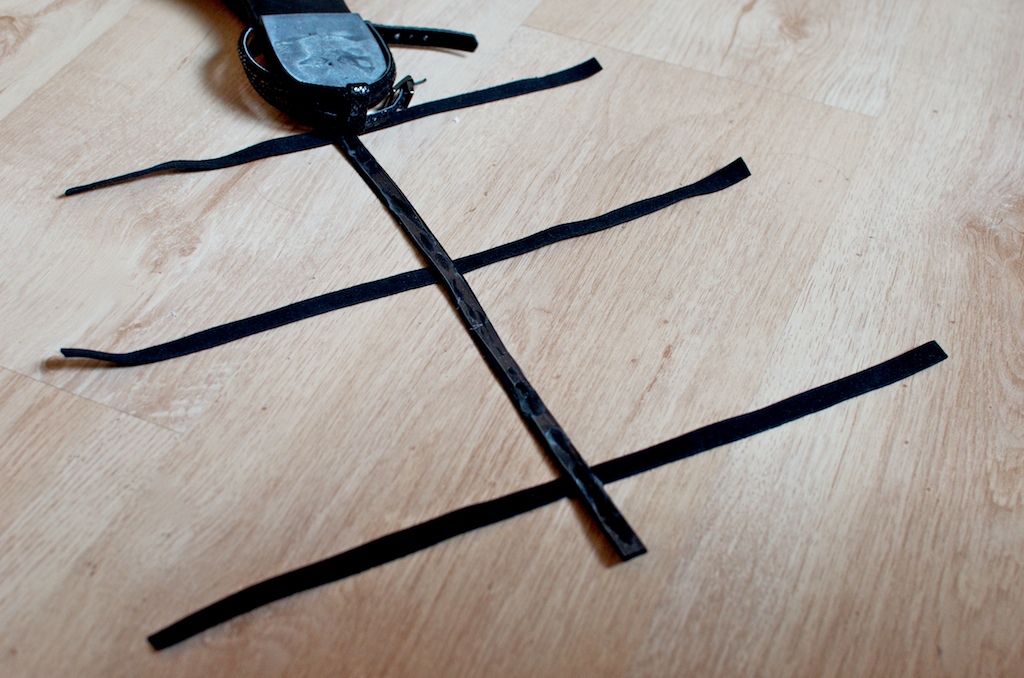
2. Cut the leather into pieces, I did three pairs matching the different widths of my leg and one pair of long strips to go vertically down the front of my leg and connect to the flat.
DIY GLADIATOR SANDALS 105

3. The top long piece is for the front of the leg while the other pieces are for around the leg.
DIY GLADIATOR SANDALS 106

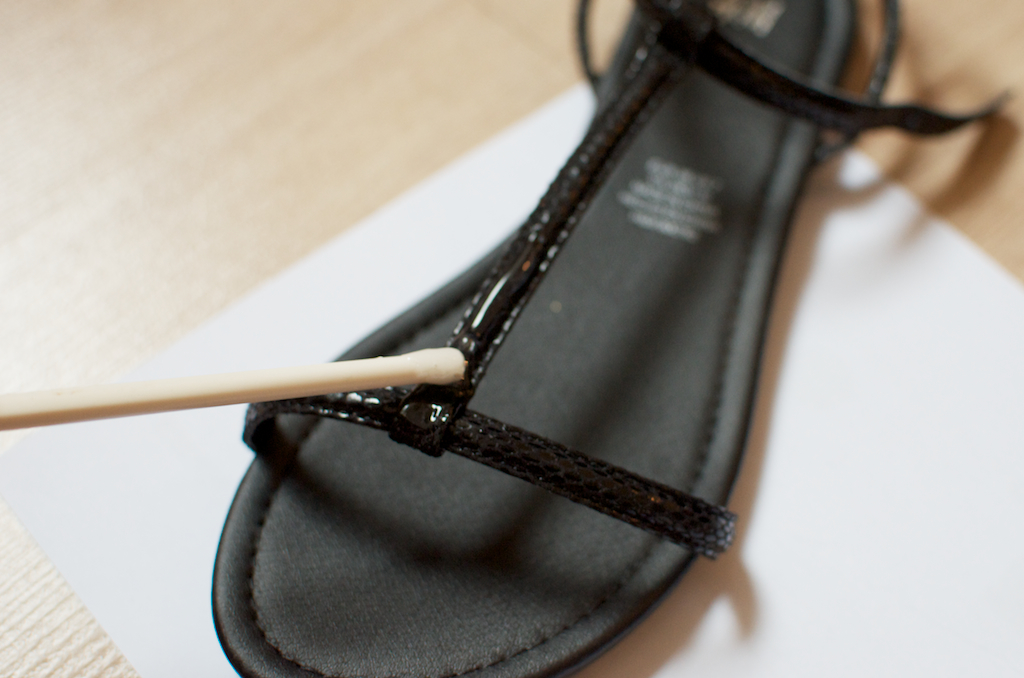
4. I then glued the long strip onto the front of the flat, I took it all the way down to the edge so the materials matched up.
DIY GLADIATOR SANDALS 107

5. This is how it will look.
DIY GLADIATOR SANDALS 108

6. This is optional. Depending on how stiff your leather is you may want to glue on some sort of reinforcement to the underside of long strip that goes up the front of the leg, just so it doesn’t bow out or bunch up. You can use wire or a strip of PVC like I did. This isn’t absolutely necessary but may help with the overall aesthetic.

DIY GLADIATOR SANDALS 099 (3)

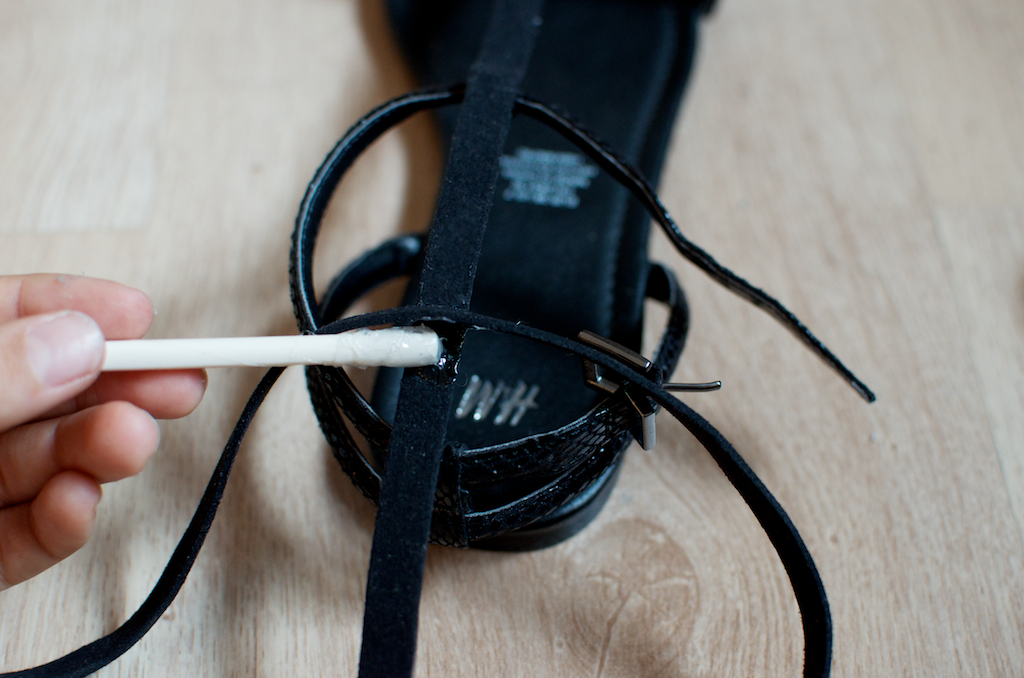
7. Glue on the horizontal straps.
DIY GLADIATOR SANDALS 109

8. Let them dry overnight.
DIY GLADIATOR SANDALS 110

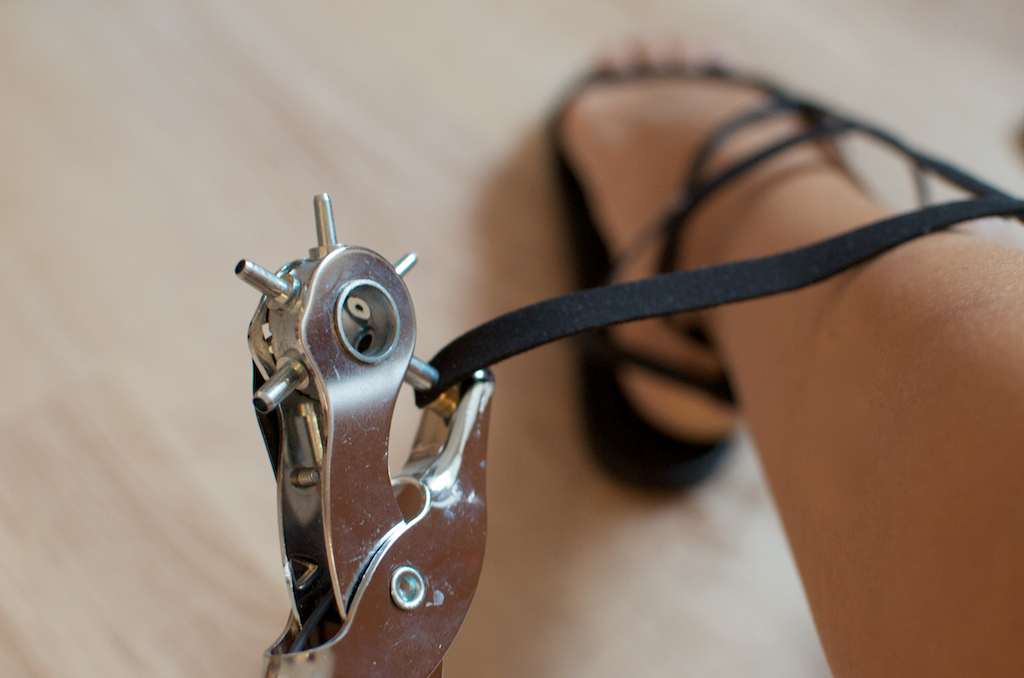
9. Measuring around your leg to work out where the stud button should go at the back, make a hole with the hole punch.
DIY GLADIATOR SANDALS 111

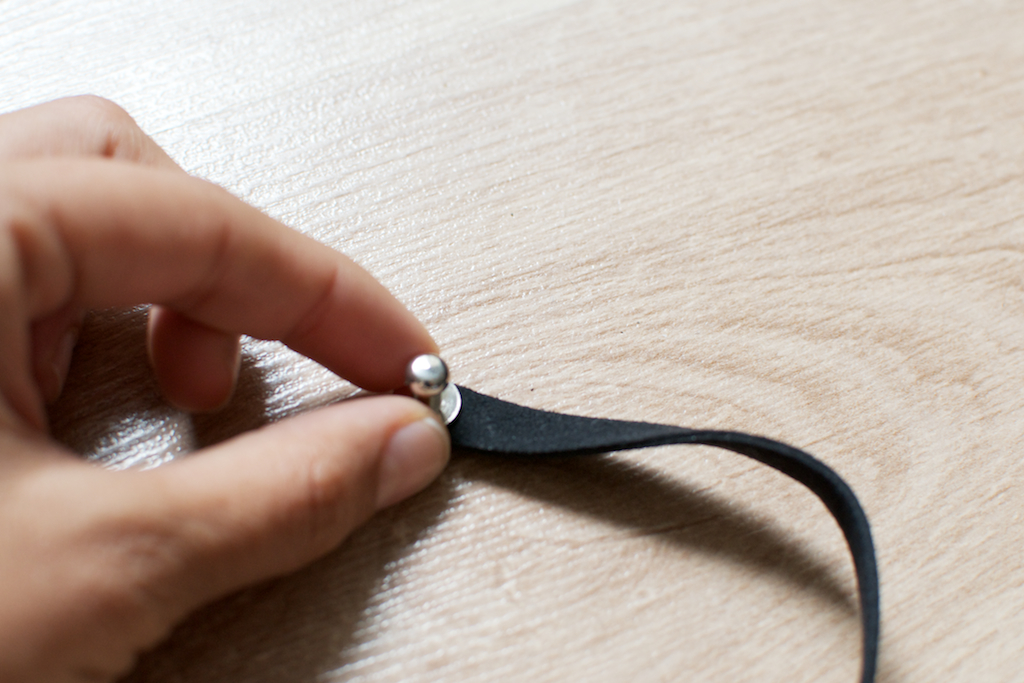
10. Insert the screw on the underside and attach the stud top on the right side.
DIY GLADIATOR SANDALS 098 (2)

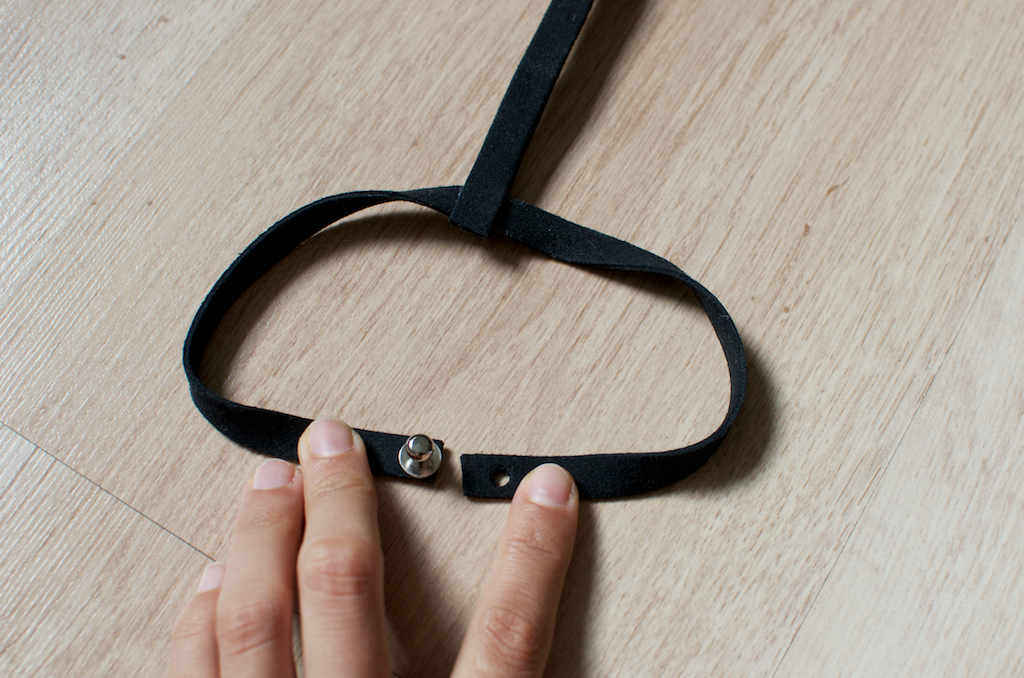
11. Finally, make a hole in the other side so you can attach the strap by pushing it on and off the stud button.
DIY GLADIATOR SANDALS 099 (2)

Voila! All done!

DIY GLADIATOR SANDALS 098 (1)

Enjoy!

Shop SheIn for the latest in Fall and Winter Fashions